
Overview
Author
Amanda Barrera
Quoted From
https://www.bigfishgames.com/blog/walkthrough/chimeras-new-rebellion-strategy-guide-hints-cheats-codes-tips-tricks/
- Place LOCK PART.
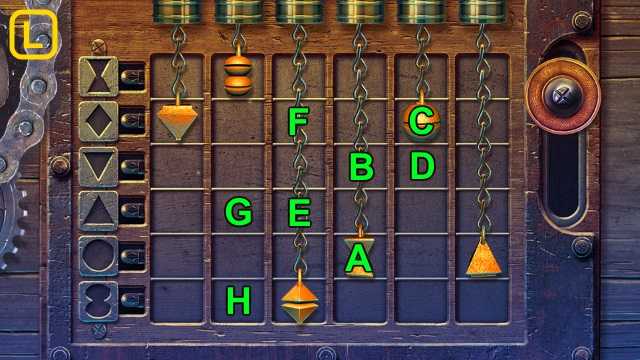
- Solution (E): I-C-I-H-I-F-I-A-I-D-E-I-B-G-Ix2.
- Solution (F).
- Receive WEREWOLF’S KEY.
- Walk forward.
- Take SPOON (G).
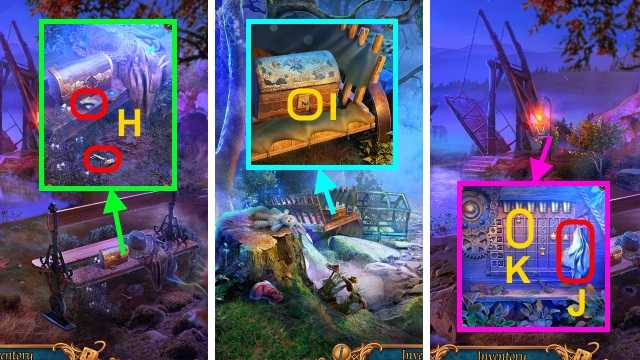
- Take CHEST KEY and MECHANISM PART (H). Use SPOON; take WEIGHT.
- Walk down.
- Use CHEST KEY (I); open. Take DUSTY LANTERN.
- Walk forward.
- Take CARETAKER’S HANDKERCHIEF (J); place WEIGHT (K).
- Solution (L): (A-B)-(C-D)-(E-F)-(G-H).
- CARETAKER’S HANDKERCHIEF on DUSTY LANTERN; take LANTERN.
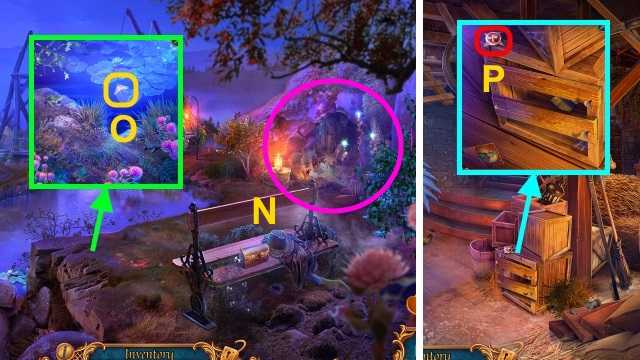
- Use LANTERN. Play HOP; receive FISHING ROD (N).
- Use FISHING ROD (O); take MECHANISM PART (2/4).
- Walk left.
- Examine scene.
- Take MILL EMBLEM (P).
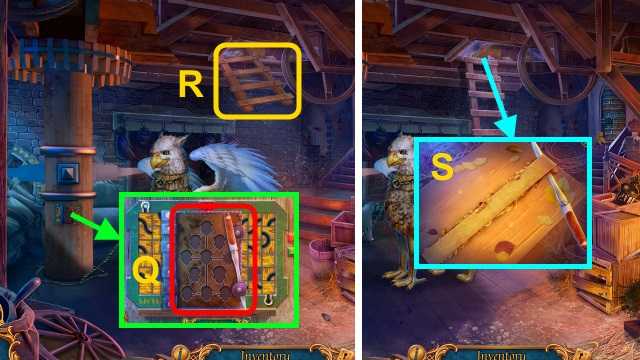
- Take CARETAKER’S FOLDER (Q).
- Examine CARETAKER’S FOLDER; take BLADE.
- Use FISHING ROD (R).
- Use BLADE (S); take CAT’S TOY and MECHANISM PART (3/4).
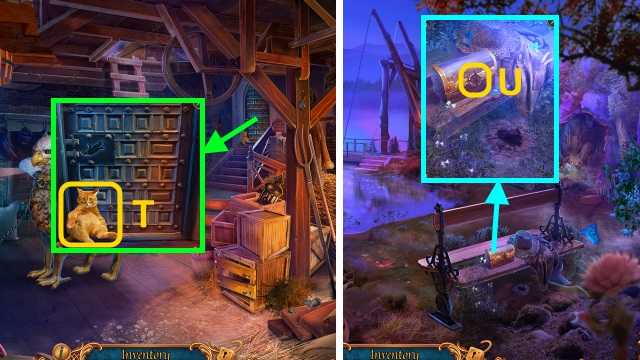
- Use CAT’S TOY (T); take DEMON SIGN.
- Walk down.
- Place MILL EMBLEM (U). Read note; take DEMON SIGN.
- 2 DEMON SIGNS on CARETAKER’S FOLDER.

- Solution (V).
- Take note and WHEAT AMULET.
- Walk left.
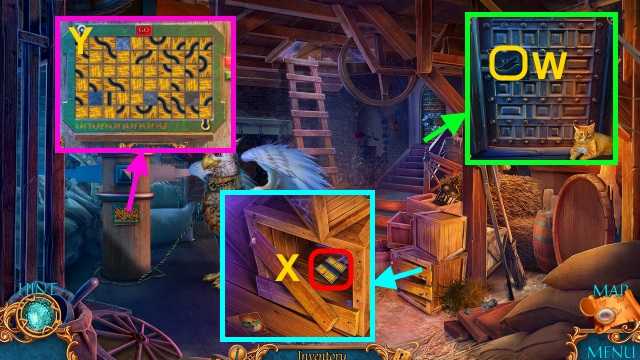
- Place WHEAT AMULET (W). Play HOP; receive PLIERS.
- Use PLIERS; take MECHANISM PART (X).
- Place MECHANISM PART (Y).

- Solution (Z): (A-B)-(C-D)-(E-F)-(G-H)-(I-J)-(K-L)-(M-N)-(O-P)-(A-N).

Some of the contents are from the internet, if these contents infringe on your copyrights, please contact me. All contents doesn't represent my points.
What's your reaction?
Very Bad
0%
Bad
0%
Average
100%
Alright
0%
Good
0%
Super
0%
Comments